Overview | Getting Started | CQFS shortcode | Action Hooks | Filter Hooks | Live Demos
Installation
Just like any other plugin installation, please go to your plugins page and click “add new”. If you have downloaded the plugin locally, please upload that and click install. Then activate it. After the CQFS plugin installation and activation is complete, you shall find two new menu items for the plugin.
- CQFS
- CQFS Settings
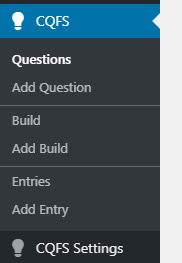
- CQFS – This menu contains all the newly created custom post types. Those are “Questions”, “Build” and “Entries”. These three post types are mainly the backbone of the plugin. Questions post type is for creating new questions. Presently you can find “checkbox” and “radio” types for a question. “Build” post type creates the shortcode for the form types of quiz, feedback and survey. Where the “Entries” post type contains the user submitted data.
- CQFS Settings – This is a basic settings page for the plugin. You can find mail settings, result page status here.
Create a question
Creating a question is simple than anything. When you click “add question” button, you will get the add new question options. The title of the post is reserved for the question itself. Then you have a textarea right after the title. Here you can place the answers in each line. It is important to use line breaks for every single answer. After that, you can choose whether it is a checkbox type or radio type question. As you can imagine, the checkbox type is for those questions which might have more than one correct answers.
After you enter the answers in text area, each line is considered as a answer. So the correct answer text field can be set as per your need. Here is a reference image below –
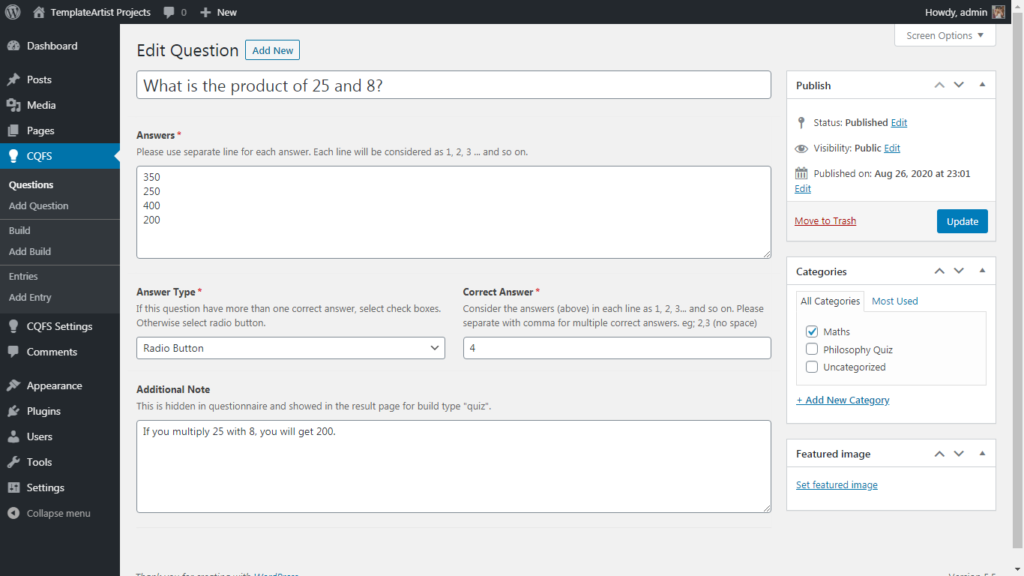
Then you need to assign a category for the question. Because the cqfs build will fetch questions by category for the shortcode. That’s all for questions. You can create as many as questions for a quiz, feedback or survey.
Create a build type
Now comes the build part of the CQFS. A build type will generate the shortcode for the questionnaire and you can use the shortcode anywhere in a page or post.
To create a build, click “add build” button and you will have the “add new” page open. Here you can select the type of the build. Basically “quiz”, “feedback” and “survey”. Right below the type, you can find the pass percentage input box. Please set a pass percentage for the build for assessment. It is necessary that you set a pass percentage for any build type you choose. However the “quiz” type result is accessible to the user with the pass/fail assessment. But you also get benefited by the pass percentage when you will assess a “feedback” or “survey”. Image reference is below –

Shortcode – You can find the build shortcode at the right side of your post. All the available attributes are displayed below the shortcode for use. It is also important that you assign categories to a build type. Otherwise all the questions regardless of categories will be shown. But if you assign categories, questions will be fetched by the assign categories.
Create a CQFS form with shortcode
Now that we have our build ready, we just need to copy the shortcode and use it in any page or post. It will display the CQFS form in front end site. The shortcode is similar to this example –
[cqfs id="210"]You may find some demo CQFS forms in our live demos page.
Resources
Overview
An overview page of CQFS plugin.
Getting Started
Find all about getting started with CQFS plugin.
CQFS shortcode
Discover CQFS shortcode use and attributes.
Action Hooks
Developers can use the available action hooks for their custom contents.
Filter Hooks
Find all available filter hooks that you can use to modify default values.
Live Demos
Discover all demos that you can easily create and use in your site.