All of us are probably aware that owl carousel which is built with jQuery, is almost dead now. The author of owl carousel is inspiring all users to switch to the Tiny Slider. This works much faster as it is built with vanilla js or in simple words it’s built with plain JavaScript. In this tutorial, we shall learn how we can create a dynamic grid carousel with tiny slider.
Lesson Objectives
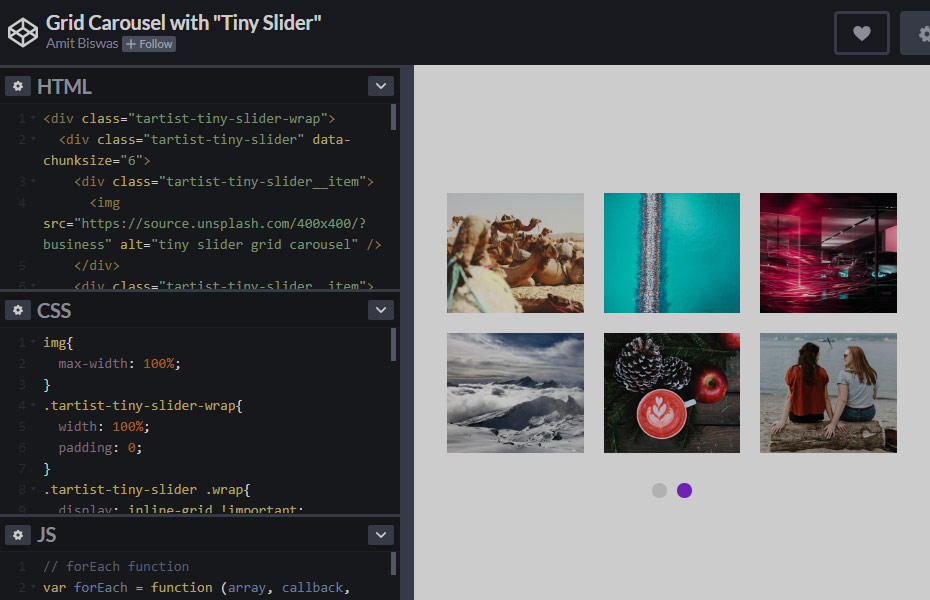
By the end of this tutorial, we are going to learn and achieve this. Here is the codepen of it – Tiny Slider Grid Carousel.
The basic usage of Tiny Slider is available at the GitHub page. However, we will be learning a different thing today. We all have used carousel in single rows before. But in this tutorial, we will learn how to convert our carousel items into a grid. Our focus will be on –
- Making multiple slider instances work with single class name.
- Doing dynamic grid carousel with row and columns.
Both of the objectives will be reached by using plain JavaScript. So we will be mostly discussing the JavaScript part in this tutorial. Let’s jump into it.
The setup of Tiny Slider
At first, we need to setup our HTML page with the tiny slider. As per the installation instruction, we need to call the tiny slider css file in header and then the JS file in footer. That’s the basic. Here is the HTML page code for your reference.
<!DOCTYPE html>
<html lang="en">
<head>
    <meta charset="utf-8">
    <meta name="viewport" content="width=device-width, initial-scale=1">
    <title>Tiny slider grid carousel</title>
    <meta name="description" content="Tiny slider grid carousel tutorial">
    <meta name="author" content="Amit Biswas">
    <!-- tiny slider css -->
    <link rel="stylesheet" href="https://cdnjs.cloudflare.com/ajax/libs/tiny-slider/2.9.2/tiny-slider.css">
</head>

<body>

    <!-- tiny slider js -->
    <script src="https://cdnjs.cloudflare.com/ajax/libs/tiny-slider/2.9.2/min/tiny-slider.js"></script>
</body>
</html>
Now we have done initial setup for the tiny slider, we can move forward with the HTML part of our slider. In the body, just before the <!-- tiny slider js -->, add the following HTML. You may use whatever you like inside the items.
<div class="tartist-tiny-slider-wrap">
    <div class="tartist-tiny-slider" data-chunksize="6">
        <div class="tartist-tiny-slider__item">Item 1</div>
        <div class="tartist-tiny-slider__item">Item 2</div>
        <div class="tartist-tiny-slider__item">Item 3</div>
        <div class="tartist-tiny-slider__item">Item 4</div>
        <div class="tartist-tiny-slider__item">Item 5</div>
        <div class="tartist-tiny-slider__item">Item 6</div>
        <div class="tartist-tiny-slider__item">Item 7</div>
        <div class="tartist-tiny-slider__item">Item 8</div>
        <div class="tartist-tiny-slider__item">Item 9</div>
        <div class="tartist-tiny-slider__item">Item 10</div>
        <div class="tartist-tiny-slider__item">Item 11</div>
        <div class="tartist-tiny-slider__item">Item 12</div>
    </div>
</div>
At this point, our HTML for the slider is ready. We can now initialize the tiny slider script for this slider. Let’s do it. Just after the tiny slider js call, we need to add another script for it. Here it is –
<script>
    //initialize tiny slider
    let slider = tns({
        container: ".tartist-tiny-slider",
        items: 3,
        slideBy: "page",
        autoplay: true,
        autoplayButtonOutput: false,
        loop: true,
        mouseDrag: true,
        controls: false,
        navPosition: "bottom",
        nav: true,
     });
</script>
As you can see, we now have initialized the tiny slider instance for our slider. The container is .tartist-tiny-slider. This code will render the slider for a single instance only. For example, if you create another div using the same class name, this code will only work for 1 instance. So for multiple instances of slider, we need to add initialization code separately. That’s certainly not flexible.
Enable multi instance mode
Here is one reference for the same – How to enable multi instance mode for tiny slider. This topic covers and teaches us how we can effortlessly enable multi instances with same container class. You can add the following code like this –
// forEach function
var forEach = function (array, callback, scope) {
  for (var i = 0; i < array.length; i++) {
    callback.call(scope, i, array[i]); // passes back stuff we need
  }
};

// tiny-slider initialisation
var sliders = document.querySelectorAll('.tartist-tiny-slider');
forEach(sliders, function (index, value) {
  let slider = tns({
    container: value
  });
});
You can see that we have written a custom forEach function and then grabbed all instances in an array with var sliders document.querySelectorAll('.tartist-tiny-slider'). Then we loop the array with our forEach function. Thus multi instance mode is now active. So, if you now clone the slider div with same class name .tartist-tiny-slider, all slider will be played individually. This is awesome.
Create the grid with our slider items
Now we have successfully looped through the tiny slider instances with same class name. If you notice, each instance will have slider items on which the tiny slider will apply it’s own wrapper via JavaScript. Just like the example below –
<div class="tartist-tiny-slider__item tns-item" aria-hidden="true" tabindex="-1">
    Item 1
</div>
Tiny slider works like this –
- It will check the parent container.
- Then it will handle each child item individually and wrap it with it’s class and initialize slider.
<div class="sliderContainer"><!-- tiny slider will initialize with the parent -->
    <div>child item 1</div>
    <div>child item 2</div>
    <div>child item 3</div>
    <div>child item 4</div>
    <div>child item 5</div>
    <div>child item 6</div>
    <div>child item 7</div>
    <div>child item 8</div>
    <!-- tiny slider will use first level child items as it's slider item -->
</div>

<!-- So now, if we can have div structure like the code below, it will be easy to style it as grid -->

<div class="sliderContainer"><!-- tiny slider will initialize with the parent -->
    <div class="wrap"><!-- now this is the first level child -->
        <div>child item 1</div>
        <div>child item 2</div>
        <div>child item 3</div>
        <div>child item 4</div>
    </div>
    <div class="wrap"><!-- now this is the first level child -->
        <div>child item 5</div>
        <div>child item 6</div>
        <div>child item 7</div>
        <div>child item 8</div>
    </div>
</div>
I have demonstrated the requirement in the above demo code. So just like that, if we have a static slider, it will not be a problem to structure our divs as above.
But, imagine if you are doing it where the child elements are going to be populated dynamically from database. For an example, if we grab 10 recent posts from our WordPress blog, it will be hard to make our divs like the above code. Here comes the intelligent part of JavaScript again.
We can modify our div structure before the tiny slider initialization and make it our own like the above code example. We will do it with pure JavaScript. Here is a stackoverflow discussion about how we all can achieve similar result with JavaScript.
The JavaScript
Here is the complete JS which will do the job.
// forEach function
var forEach = function (array, callback, scope) {
    for (var i = 0; i < array.length; i++) {
        callback.call(scope, i, array[i]); // passes back stuff we need
    }
}

// select all slider parent div.tartist-tiny-slider
var sliders = document.querySelectorAll('.tartist-tiny-slider');

// chunk function to make groups for every slider's childrens
var chunk = function ( array, size ) {
    let arr = [];
    for ( let i = 0; i < array.length; i += size ) {
        let newSlicedArray = Array.prototype.slice.call( array, i, i + size );
        arr.push(newSlicedArray);
    }
    return arr;
}

// applying foreach function to the sliders
forEach(sliders, function (index, value) {

    //selecting childrens
    let childrens = value.querySelectorAll(".tartist-tiny-slider__item");

    //getting chunksize from the parent
    let chunkSize = value.dataset.chunksize;

    //making final arrays for the children with chunk size
    let final = chunk( childrens, parseInt(chunkSize) );

    //wrapping the chunks with div.wrap
    let newHTML = final.map( towrap => towrap.reduce( (acc, el) => (acc.appendChild(el),acc) , document.createElement('div') ) ).forEach( el => {
        el.className ="wrap";
        value.appendChild(el)
    })

    //initialize tiny slider
    let slider = tns({
        container: value,
        items: 1,
        slideBy: "page",
        autoplay: true,
        autoplayButtonOutput: false,
        loop: true,
        mouseDrag: true,
        gutter: 20,
        controls: false,
        navPosition: "bottom",
        nav: true,
    });

});
If you go back to our HTML code, we have added data-chunksize attribute to the slider container. This attribute will define the grid size in our JS code. Now that we have placed our JavaScript and HTML, let’s go ahead and add little styling for our grid.
The CSS
body{
    font-family: Arial, Helvetica, sans-serif;
    font-size: 16px;
}
img{
    max-width: 100%;
}
.tartist-tiny-slider-wrap{
    width: 100%;
    padding: 0;
}
.tartist-tiny-slider .wrap{
    display: inline-grid !important;
    grid-template-columns: repeat(3, 1fr);
    gap: 20px;
}
.tartist-tiny-slider__item{
    display: flex;
    justify-content: center;
    align-items: center;
    height: 150px;
    font-size: 1.2em;
    background-color: #2779a8;
    color: #ffffff;
}
.tartist-tiny-slider__item:nth-child(2n+1){
    background-color: #ffc40c;
    color: #212121;
}
.tartist-tiny-slider__item > img {
    width: 100%;
    height: 100%;
    object-fit: cover;
}
.tns-nav {
    text-align: center;
    margin-top: 30px;
}
.tns-nav button{
    width: 15px;
    height: 15px;
    border-radius: 20px;
    border: none;
    margin: 0 5px;
    background-color: #dddddd;
}
.tns-nav button.tns-nav-active{
    background-color:#2779a8;
}

@media (min-width: 800px){
    .tartist-tiny-slider-wrap{
        width: 768px;
        margin: 0 auto;
    }
    .tartist-tiny-slider__item{
        height: 250px;
        font-size: 2em;
    }
}
The above CSS code will be good enough to properly visualize our dynamic grid carousel. You can check entire project and codes together at this codepen. As you can imagine, there are many more possibilities to use this concept in your projects. We can make dynamic image grid sliders, posts sliders and more. We can also make Elementor widget with this concept and take it to the next level of development.
All resources together
- Tiny Slider
- How to enable multi instance mode for tiny slider
- Wrap every nth item
- Entire project in codepen